Why You Should Learn JAX: A Molecular Dynamics Showcase

I began using JAX after experiencing disappointment with PyTorch for optimizing my Python scripts.
My project involved two main components: calculating descriptors based on positions of atoms and using those descriptors as inputs to multiple neural networks to predict total potential energy and forces for a system of particles.
While the neural network part was sufficiently fast, the descriptor calculation, particularly gradient evaluation, did not perform efficiently even after using TorchScript.
Seeking an alternative framework in Python that supports automatic differentiation, I discovered JAX.
It proved to be highly effective for building (physics-aware) machine learning models, offering both the flexibility and performance I needed.
It must be noted that I don’t have any objections to using PyTorch; in fact, I often use it when building machine learning models including for language processing or object detection tasks. However, I believe it might not be the best choice if your goal is to develop a custom yet optimized model, probably from scratch, in Python. PyTorch excels in many areas, but for highly customized and specific model architectures, there might be more suitable alternatives that offer greater performance.
JAX provides a suite of features that perfectly met my intended requirements, including automatic differentiation (autodiff), Just-In-Time (JIT) compilation, GPU-accelerated computing, and support for vectorized computation. Additionally, JAX handles mutability in a way that aligns functional programming paradigm. Through this post, my aim is to share my hands-on experience with JAX, offering motivation for you to delve into and use JAX for your own projects.
Prerequisite packages
To follow along, you’ll need to install a few Python packages as follow:
-
JAX: A high-performance numerical computing library in Python that provides automatic differentiation and optimized execution on CPUs and GPUs. Please follow this installation instruction.
- ASE:
A toolkit for setting up, manipulating, and analyzing atomistic simulations, widely used in computational materials science
pip install ase - Pantea:
My Python package, currently in development state, created for developing machine learning models for inter-atomic potentials.
pip install pantea==0.10 - NGLView (optional):
A Jupyter widget to interactively view molecular structures and trajectories.
conda install nglview -c conda-forge
JAX will automatically use the GPU on your system if it’s accessible; otherwise, it will default to utilizing the CPU. You have also the freedom to manually set the computing device by adjusting the JAX_PLATFORM_NAME environment variable beforehand.
Also, by default, JAX uses float32 data type, which represents single-point precision. However, scientific simulations typically require double precision float64 due to their higher accuracy. It’s recommended to opt for lower precision whenever feasible for improved computational performance (by approximately a factor of 2) and reduced memory usage.
The following script demonstrates how to configure JAX to select the device and enable double precision.
import os
os.environ["JAX_PLATFORM_NAME"] = "cpu"  # disable GPU computing
os.environ["JAX_ENABLE_X64"] = "1"       # enable double precision

import jax
For simple examples, I’ll use the default float32 precision but will use double precision for the demonstration of molecular dynamics. Additionally, all computations in this post are executed on my laptop’s GeForce MX130 GPU unless explicitly stated otherwise.
Following the steps outlined above will provide you with the essential tools to reproduce the examples covered in this post.
Let’s get started!
Why JAX?
JAX is open source and composable Python library for array-oriented computation with JIT compilation, accelerated computing, and automatic differentiation to enable high-performance numerical computing such as machine learning, optimization, and scientific simulations. It allows users to write code using familiar NumPy syntax while automatically and efficiently transforming that code to run on GPUs and TPUs, making it highly suitable for tasks that require intensive computation. Linear Algebra Accelerated X (LAX) serves as a sub-module within the JAX library, providing optimized implementations of various linear algebra routines. I strongly recommend visiting the JAX’s documentation page for more details, which offers extensive information and resources, for example see this tutorial.
While some describe JAX as simply a multi-threaded NumPy library, I argue otherwise. It offers much more than that. In the subsequent sections, I’ll showcase some of JAX’s key features that played a crucial role in developing my project.
I. JIT-compilation
Just-In-Time (JIT) compilation is a method of compiling code at runtime, rather than ahead of time. This allows for the optimization of the code for the specific system it is running on, and can lead to improved performance over pre-compiled code. A Python script is interpreted, which means that the code is read and executed line-by-line by the Python interpreter. This can be slower than compiled code because the interpreter must process each line of code before it can be executed.
JIT compilation in contrast converts the Python code into machine code at runtime which can be executed directly by the computer’s CPU. This effectively eliminates Python’s overhead and can lead to improved performance over interpreted code. Consider the following example of a dummy kernel function, which takes an array as input and returns a result:
import jax.numpy as jnp

def kernel(x):
  """A dummy kernel function."""
  result = 0
  for i in range(10):
      result += i * jnp.sin(jnp.cos(x))
  return result.sum()
Let’s generate a random input array and measure the execution time of the implemented function call without JIT compilation.
import jax

x = jax.random.normal(jax.random.key(2024), shape=(100_000, ))
# Array([ 0.8188207 ,  0.70407075, -0.553007  , ..., -0.07251461,
#       -1.353674  , -0.21451078], dtype=float32)

%timeit kernel(x).block_until_ready()
2.34 ms ± 134 µs per loop (mean ± std. dev. of 7 runs, 100 loops each)
The %timeit is a magic command in Jupyter notebooks and IPython used to measure the execution time of a piece of code. It runs the code multiple times to obtain an average execution time, providing a more accurate measure of performance by accounting for variability.
As JAX uses asynchronous dispatch, calling block_until_ready() method on JAX arrays locks Python program execution until those arrays are finished computing. This is recommended when writing micro benchmarks of computation times.
The reported result, 2.34 ms ± 134 µs per loop, indicates the average time taken per loop along with the standard deviation, based on 7 runs with 100 loops each.
Let’s now create a JIT-compiled version of this function (which can also be applied using a decorator), and subsequently I’ll reevaluate its execution time.
import jax

jitted_kernel = jax.jit(kernel)

# Warm-up call
# jitted_kernel(x)

%timeit jitted_kernel(x).block_until_ready()
82.5 µs ± 1.9 µs per loop (mean ± std. dev. of 7 runs, 10,000 loops each)
Speed up:  29x
A Warm-up call for the JIT function is generally executed to compile and optimize its performance before assessing its speed. I omitted this step since the function implementation is straightforward.
The compiled function runs 29 times faster compared to the non-compiled version, showcasing the significant performance enhancement achieved through JIT compilation. This JAX feature indeed empowers you to write high-performance Python functions.
II. Automatic differentiation
Automatic differentiation is a computational technique used to automatically calculate the derivatives of functions. Unlike numerical differentiation, which approximates derivatives using finite differences, or symbolic differentiation, which manipulates expressions to find derivatives, autodiff evaluates derivatives exactly and efficiently by applying the chain rule of calculus systematically. Nowadays, autodiff plays a pivotal role in deep learning frameworks such as PyTorch, TensorFlow, and indeed JAX. It is particularly valuable as it allows for efficient computation of gradients, which are essential for optimization algorithms like gradient descent.
Autodiff is its core feature of JAX that simplifies and accelerates the process of computing gradients. It provides several functions to perform differentiation, the most prominent being jax.grad, which computes gradients of scalar-valued functions with respect to their inputs.
Let’s consider the previous example kernel. Using the jax.grad, we can easily calculate the gradient of output respect to each input using the following code:
import jax

gradient_kernel = jax.grad(kernel)

kernel(x)
# Array(2401043.5, dtype=float32

gradient_kernel(x)
# Array([-25.491356 , -21.069756 ,  15.582619 , ...,   1.7687505,
#        42.92778  ,   5.35899  ], dtype=float32)

%timeit gradient_kernel(x).block_until_ready()
56.3 ms ± 7.11 ms per loop (mean ± std. dev. of 7 runs, 10 loops each)
Furthermore, thanks to the composability feature of JAX, we have the capability to seamlessly combine jax.grad with jax.jit to create an optimized function that automatically calculates the gradient of the kernel. By doing so, we harness the power of JAX’s automatic differentiation to compute gradients efficiently, while also benefiting from JIT compilation to enhance performance.
import jax

jitted_gradient_kernel = jax.jit(gradient_kernel)

%timeit jitted_gradient_kernel(x).block_until_ready()
192 µs ± 37.7 µs per loop (mean ± std. dev. of 7 runs, 1 loop each)
In context of molecular simulations, inter-atomic forces in a physical system are obtained from gradient of the total potential energy function. This relation highlights the importance of automatic differentiation, as it provides a precise and efficient means of calculating the components of force. By using automatic differentiation, we can accurately compute the necessary derivatives of the potential energy function, ensuring that the force components are determined with high precision.
III. Automatic vectorization
Vectorized computation refers to the process of applying operations to an entire array rather than individual elements. This utilizes the capabilities of modern CPUs and GPUs (i.e. SIMD) to perform computations in parallel, resulting in significantly faster execution times compared to traditional loop-based approaches. In order to write efficient code in Python you should avoid using loops most of the time and instead relying on efficient implementation of the universal functions that operate on arrays. Based on my experience, transitioning to numerical Python often necessitates a shift in mindset. While low-level programming languages such as C/C++ commonly employ numerous loops, the approach in numerical Python emphasizes avoiding loops and translating logic into vector functions. Leveraging vectorized calculations significantly enhances the overall performance. NumPy benefits from vectorized computing in its functions and in fact it is a key factor in its performance and efficiency.
The jax.vmap transformation is designed to generate vectorized implementation of a function automatically, making it easier to apply a function over arrays in a parallel and efficient manner. Also, it simplifies the code by removing the need for explicit loops.
An example of how to calculate distances between arrays of positional vectors is particularly relevant in this context as determining the distances between atoms is essential for evaluating the potential energy in molecular simulations. Let’s consider that we have two arrays, x and y, each containing positional vectors for a set of atoms. Both arrays have dimensions (natoms, 3), where natoms represents the number of atoms, and each vector in the arrays contains 3D coordinates of an atom. Our objective is to compute a distance matrix that captures the distances between every pair of vectors from these arrays. The function below returns this matrix of distances between the two input arrays:
import jax.numpy as jnp

def calculate_distances(x, y):
    distances = []
    nrows, _ = x.shape
    for i in range(nrows):
        distances_from_single_point = jnp.sqrt(((x[i] - y)**2).sum(axis=1))
        distances.append(distances_from_single_point)
    return jnp.array(distances)
Here, I used array computing to efficiently calculate the distances from each point in the array x to every point in the array y. For example, broadcasted term x[i] - y allows us to perform element-wise subtraction without the need for explicit loops, thereby enhancing computational efficiency and indeed clarity.
An alternative implementation for computing distances from a single point is jnp.linalg.norm(x[i]-y, ord=2, axis=1), which uses optimized JAX’s linear algebra sub-modules.
This process can be automatically and efficiently vectorized in JAX. Using jax.vmap, we can transform the function that operates on a single point into one that seamlessly processes entire the array of position vectors in parallel. To achieve this, we first define the function to handle a single point, namely calculate_distances_from_single_point. Then, using jax.vmap, we generalize this function to apply across the first index of the input arrays, enabling efficient computation over batches without any for loops. This approach not only simplifies the code but also takes advantage of JAX’s optimization capabilities for faster execution.
import jax

def calculate_distances_from_single_point(xi, y):
    return jnp.sqrt(((xi - y)**2).sum(axis=1))

vmapped_calculate_distances = jax.vmap(
calculate_distances_from_single_point,
in_axes=(0, None)
)
The in_axes=(0, None) specifies the input axes for the vectorized function. In this case, the first argument (xi) is mapped along the first axis (0), while the second argument (y) remains unchanged (None), indicating that it remains unchanged across all computations.
Both implementations produce identical results. The below assertion ensures that the distances computed by the for-loop implementation are equal to those computed by the vectorized implementation.
import jax

# Generate a random array of shape=(natoms, dim)
x = jax.random.normal(jax.random.key(2024), shape=(100, 3))

assert jnp.allclose(
  calculate_distances(x, x),
  calculate_distances_vmap(x, x)
)
Nevertheless, the performance of the mapped function is significantly faster due to better vectorization. And, the implementation is more readable. The time profiling results clearly demonstrate these differences as follows:
%timeit calculate_distances(x, x).block_until_ready()
93.5 ms ± 6.04 ms per loop (mean ± std. dev. of 7 runs, 10 loops each)
Speed up:  1x

%timeit vmapped_calculate_distances(x, x).block_until_ready()
2.54 ms ± 147 µs per loop (mean ± std. dev. of 7 runs, 100 loops each)
Speed up:  36x
We can now again combine JIT compilation with jax.vmap to achieve a better performance.
jitted_vmapped_calculate_distances = jax.jit(vmapped_calculate_distances)

%timeit jitted_vmapped_calculate_distances(x, x).block_until_ready()
60.3 µs ± 1.59 µs per loop (mean ± std. dev. of 7 runs, 10,000 loops each)
Speed up: 1558x
This combination maximizes the efficiency of our computations by taking full advantage of JAX’s advanced optimization techniques, which I wanted to discuss in this post.
In the next section, I’ll present a molecular dynamics showcase to illustrate that JAX can be a reliable framework for solving real-world problems and building high-performance applications in Python.
Molecular Dynamics Showcase
Straightforward and well-defined code examples in documentations often fall short when dealing with complex problems. Also, engaging with more serious problems always enhances our understanding and enables us to make use of advanced features to develop optimized applications. I hope you’ll find this showcase helpful, even without delving into the intricate details of molecular simulations, which demand their own specialized expertise. This is why I’ve opted to focus on a simple atomic system, aiming to highlight the main JAX features necessary for optimizing the scripts. The example is intentionally kept simple to facilitate a clearer understanding of the underlying domain knowledge. What is MD simulation?
Molecular dynamics (MD) simulation is a powerful computational method used to study the physical movements of atoms and molecules. It provides detailed insights into the physical and chemical properties of complex systems by simulating the motions of these particles. MD simulations are widely used in various fields such as physics, chemistry, materials science as they offer a microscopic view of phenomena that are challenging to capture experimentally.
An essential part of an MD simulation is force field. It is a set of mathematical functions and parameters that define the potential energy of a molecular system. It determines how atoms interact with each other, providing the forces that drive their movements. Atoms move according to Newton’s equations of motion, which describe how the positions and velocities of particles change over time in response to forces acting upon them. The Verlet algorithm is a commonly used numerical integration method in order to solve Newton’s equations of motion. Initial structure
To start an MD simulation, the positions and velocities of atoms are generally initialized based on a specific configuration, such as an experimental structure or a randomly generated arrangement. Accordingly, the below code creates a simple cubic lattice of helium atoms using ASE package, and creating the corresponding structure in Pantea which represents a container for storing atomic coordinates and related information in JAX arrays:
from ase import Atoms
from ase.visualize import view
from pantea.atoms import Structure

d = 6  # distance between atoms in Angstrom
unit_cell = Atoms('He', positions=[(d/2, d/2, d/2)], cell=(d, d, d))
initial_structure = Structure.from_ase(unit_cell.repeat((10, 10, 10)))

view(atoms=initial_structure.to_ase(), viewer='ngl')

Lennard-Jones Force field
One simple force field to describe interaction between a pair of atoms is Lennard-Jones (LJ). It is particularly useful for modeling weak intermolecular attractions and repulsion. Let’s define a potential class that calculate total Lennard-Jones potential energy and force components for a given input structure.
import jax
import jax.numpy as jnp
from jax import Array
from pantea.atoms import Structure
from typing import NamedTuple, Optional

class LJPotentialParams(NamedTuple):
    epsilon: Array
    sigma: Array

class LJPotential:
    """A simple implementation of Lennard-Jones potential."""
    def __init__(
        self,
        sigma: float,
        epsilon: float,
        r_cutoff: float,
    ) -> None:
        self.sigma = jnp.array(sigma)
        self.epsilon = jnp.array(epsilon)
        self.r_cutoff = jnp.array(r_cutoff)

    def __call__(self, structure: Structure) -> Array:
        """Compute the total potential energy."""
        return _compute_total_energy(
            LJPotentialParams(self.epsilon, self.sigma),
            structure.positions,
            structure.lattice,
            self.r_cutoff,
        )

    def compute_forces(self, structure: Structure) -> Array:
        """Compute the force components for all atoms."""
        return _compute_forces(
            LJPotentialParams(self.epsilon, self.sigma),
            structure.positions,
            structure.lattice,
            self.r_cutoff,
        )
LJPotentialParams is a named tuple that stores two required parameters for the Lennard-Jones potential.
LJPotential class takes an input structure and passing the required arguments to the two internal kernel functions _compute_total_energy and _compute_forces are actually responsible for computing and returning the desired physical quantities.
This is where the exciting part begins with leveraging JAX features to optimize functions. Next, I’ll discuss separately those kernels of energy and force calculations. Potential energy
Theory
The Lennard-Jones potential between two atoms is defined by the following equation:
\[V(r)=4\epsilon\left[ \left(\frac{\sigma}{r}\right)^{12} - \left(\frac{\sigma}{r}\right)^6 \right], \qquad r<r_{\mathrm{cut}}\]Equation 1: Lennard–Jones potential with cutoff distance $r_{\mathrm{cut}}$.
Where, $V(r)$ is the potential energy as a function of the distance $r$ between two particles. $\epsilon$ parameter is the depth of the potential well, indicating the strength of the attraction. $\sigma$ parameter is the finite distance at which the inter-particle potential is zero, representing the effective diameter of the atoms. The first term describes the attractive van der Waals forces that dominate at longer ranges and the second term accounts for the Pauli repulsion due to overlapping electron orbitals at very short distances. $r_{cut}$ is the cutoff radius beyond which the potential is considered to be zero. The cutoff is usually used to limit the range of interactions to improve efficiency and physical accuracy.
For a system of $N$ particles, the total potential energy $U$ is the sum of pairwise interactions over all particle pairs as follows:
\[U=\sum_{i=1}^{N-1}\sum_{j=i+1}^{N} V(r_{ij})\]Equation 2: total potential energy
Where, $r_{ij}$ is the distance between atom $i$ and atom $j$. We must ensure each pair of particles is considered only once (no double counting) and self-interactions are ignored.
Implementation
The below Python code defines a function that first calculates the Lennard-Jones potential energy between pairs of atoms.
def _compute_pair_energies(params: LJPotentialParams, r: Array) -> Array:
    term = params.sigma / r
    term6 = term**6
    return 4.0 * params.epsilon * term6 * (term6 - 1.0)
The _compute_pair_energies function computes the Lennard-Jones potential energy for pairs of atoms given their distances (r). It uses the potential parameters (params) and performs the calculations (Equation 1) to return an array of potential energies.
Next, we define a JIT-compiled function to calculate the total Lennard-Jones potential energy for a system of atoms by summing the pairwise potentials as follows:
import jax
import jax.numpy as jnp
from pantea.atoms.neighbor import _calculate_masks_with_aux_from_structure

@jax.jit
def _compute_total_energy(
    params: LJPotentialParams,
    positions: Array,
    lattice: Optional[Array],
    r_cutoff: Array,
) -> Array:
    masks, (rij, _) = _calculate_masks_with_aux_from_structure(
        positions, r_cutoff, lattice
    )
    pair_energies = _compute_pair_energies(params, rij)
    pair_energies_inside_cutoff = jnp.where(masks, pair_energies, 0.0)
    return 0.5 * jnp.sum(pair_energies_inside_cutoff)
The _calculate_masks_with_aux_from_structure function computes boolean arrays (masks) that indicate whether each pair of atoms is within the cutoff distance, while excluding self-interactions. Additionally, it returns an array containing distances between pairs of atoms (rij) to avoid recalculating them for the pair potential evaluation.
I import this function from Pantea to simplify the discussion. To calculate distances, it also takes into account the periodic boundary conditions of the simulation box (lattice).
As discussed before, the _compute_pair_energies function computes the LJ potential energy for each pair of atoms using the potential parameters and distances (rij).
The jnp.where is for applying the masks by setting energies to zero for pairs outside the cutoff distance. This method efficiently applies conditional logic to arrays without using loops. np.where is implemented in highly optimized C code under the hood. It operates on entire arrays at once, leveraging JAX ability to perform vectorized operations.
The total energies will be returned using jnp.sum. Multiplies by 0.5 to account for double-counting each pair interaction, since each pair is considered twice.
In short, the _compute_total_energy function calculates the total Lennard-Jones potential energy for a system of atoms using Equation 2. We first determine which pairs of atoms are within the cutoff distance by generating boolean masks. Then, we compute the pairwise Lennard-Jones energies for all pairs using rij, filter pair energies inside the cutoff, and sum the pair energies by taking into account the cutoff distance. The resulted function is integral to MD simulations, providing the total interaction energy based on atomic positions.
It might seem excessive since pair energies need to be calculated for atoms anyway. In the past, I attempted to avoid this by adding if statements, but the performance was significantly worse compared to this implementation, which uses vectorized computing. This highlights the need to shift from traditional low-level language approaches and focus on array computing for critical computations. While you could spend days optimizing everything in C/C++, this method in Python allows you to achieve much better performance through vectorization with far less development time. Additionally, many JAX operations are internally parallelized and utilize multiple threads to further optimize execution time.
The example code below demonstrates the calculation of the total potential for an input structure containing 1000 atoms, along with the estimated execution time:
from pantea.units import units

# LJ potential between He atoms
ljpot = LJPotential(
    sigma=2.5238 * units.FROM_ANGSTROM,             # Bohr
    epsilon=4.7093e-04 * units.FROM_ELECTRON_VOLT,  # Hartree
    r_cutoff=6.3095 * units.FROM_ANGSTROM,          # 2.5 * sigma
)

ljpot(initial_structure)
# Array(-0.00114392, dtype=float64)

%timeit ljpot(initial_structure).block_until_ready()
5.12 ms ± 38.9 µs per loop (mean ± std. dev. of 7 runs, 100 loops each))
Force vector
Theory
Force between two particles in a Lennard-Jones system can be derived from the potential energy. Force vector $F_{ij}$ on particle $i$ due to particle $j$ is given by the negative gradient of the Lennard-Jones potential $V(r_{ij})$:
\[\mathbf{F}_{ij} = 24\epsilon \left[ 2\left(\frac{\sigma}{r_{ij}}\right)^{12} - \left(\frac{\sigma}{r_{ij}}\right)^6 \right] \frac{\hat{\mathbf{r}}_{ij}}{r_{ij}}\]Equation 3: Force between two atoms
$r_{ij} = r_i - r_j$ represents the vector pointing from particle $j$ to particle $i$. We apply a cutoff for forces as well. For the total force on particle $i$, we sum the contributions from all other particles $j$:
\[\mathbf{F}_i=\sum_{j\neq i}\mathbf{F}_{ij}\]Equation 4: Total force acting on an atom
This will give you the net force acting on particle i due to all other particles in the system while excluding the self interaction.
Implementation
The below code computes forces between pair of atoms using Equation 3:
def _compute_pair_forces(params: LJPotentialParams, r: Array, R: Array) -> Array:
    term = params.sigma / r
    term6 = term**6
    coefficient = -24.0 * params.epsilon / (r * r) * term6 * (2.0 * term6 - 1.0)
    return jnp.expand_dims(coefficient, axis=-1) * R
The _compute_pair_forces function calculates the forces between pairs of atoms using the Lennard-Jones potential. The function takes in parameters defining the potential, distances between atom pairs, and the relative position vectors.
jnp.expand_dims(factor, axis=-1) * R: Scales the relative position vectors R by the computed force factor, and uses expand_dims to ensure the dimensions are appropriate for broadcasting in the multiplication. The resulting array represents the forces between each pair of atoms.
Next, we compute the total forces using Equation 4 as follows:
@jax.jit
def _compute_forces(
    params: LJPotentialParams,
    positions: Array,
    lattice: Optional[Array],
    r_cutoff: Array,
) -> Array:
    masks, (rij, Rij) = _calculate_masks_with_aux_from_structure(
        positions, r_cutoff, lattice
    )
    pair_forces = _compute_pair_forces(params, rij, Rij)
    pair_forces_inside_cutoff = jnp.where(
        jnp.expand_dims(masks, axis=-1),
        pair_forces,
        jnp.zeros_like(Rij),
    )
    return jnp.sum(pair_forces_inside_cutoff, axis=1)
The _compute_forces function calculates the total forces on each atom, with JIT compilation for optimization.
The _calculate_masks_with_aux_from_structure function calculates the cutoff boolean masks and additionally returns the pairwise distances (rij) and also relative position vectors (Rij).
jnp.where applies the computed pairwise forces only where the mask is True.
jnp.expand_dims(masks, axis=-1) ensures that the mask dimensions match those of Rij for multiplication broadcasting. If the mask is False, it assigns a zero force vector (jnp.zeros_like(Rij)). Additionally, JAX uses a memory pool to reduce overhead, so allocating zero-size vectors isn’t computationally expensive, as reassigning a reference to an array doesn’t involve actual memory allocation from the OS.
Finally, return jnp.sum(pair_forces, axis=1) sums the pairwise forces to obtain the total force acting on each atom, considering all other atoms.
Similar example code for calculating the force components for all atoms in the box and measuring the execution time:
ljpot.compute_forces(initial_structure)
# Array([[ 1.11173074e-21,  1.11173074e-21,  1.11173074e-21],
#       ...,
#       [-1.87935435e-21, -1.87935435e-21, -1.87935435e-21]],  dtype=float64)

%timeit ljpot.compute_forces(initial_structure).block_until_ready()
6.71 ms ± 4.63 µs per loop (mean ± std. dev. of 7 runs, 100 loops each)
Using autodiff
As previously mentioned, force is the gradient of the total energy. Therefore, instead of manually calculating the gradient, we can equivalently use JAX’s autodiff feature to compute the forces applied to each atom. This can be achieved using jax.grad as shown below code:
import jax

# here we calculate gradient of the total energy respect to the positions
_compute_forces_using_autodiff = jax.jit(
  jax.grad(_compute_total_energy, argnums=1)
)

# same input arguments as the "_compute_total_energy" function will be used
forces = _compute_forces_using_autodiff(
            LJPotentialParams(self.epsilon, self.sigma),
            structure.positions,
            structure.lattice,
            self.r_cutoff,
        )
It’s important to note that calculating forces using automatic differentiation is roughly 2x slower than the previous method. However, this approach is very useful when directly calculating the gradient of the potential is complex and practically not feasible. Below, I’ll present the results using the direct method unless I indicate otherwise.
Up to this point, we’ve implemented a JAX version of the Lennard-Jones potential required for our MD simulation. The next step is to use this potential and the initial structure to simulate the system over time. MD Simulation
To simulate the system, I use the MDSimulator module available in Pantea. It defines how the simulation will be conducted, including the integration algorithm, thermostat, and any other necessary simulation settings. Since we are simulating the system at constant room temperature, it is necessary to define a thermostat.
Let’s Initialize the MD simulator using the following parameters:
from pantea.simulation import MDSimulator, BrendsenThermostat

time_step = 0.5 * units.FROM_FEMTO_SECOND      # 0.5e-15 second
thermostat = BrendsenThermostat(               # control temperature
  target_temperature=300.0,                    # room temperature 26°C
  time_constant=100 * time_step                # how quickly adjust temperature
)
simulator = MDSimulator(time_step, thermostat)
Next, we create a system which is in fact merely a representation of the atoms and the potential interactions between them. It includes information such as atomic positions, velocities, and interaction parameters. The system can be created from the input structure as follows:
from pantea.simulation import System

system = System.from_structure(
  initial_structure,   # initial positions of atoms
  potential=ljpot,     # set LJ as interatomic potential
  temperature=300.0    # initialize atom velocities based on temperature
)
Finally, we call simulate function run the MD simulation.
from pantea.simulation import simulate

# simulate(sys, simulator) # warm up
simulate(system, simulator, num_steps=10000, output_freq=1000)
num_steps=10000: This parameter sets the total number of simulation steps to be performed. Each step typically corresponds to a small increment of simulated time, during which the positions and velocities of the atoms are updated.
output_freq=1000: This parameter specifies how often the simulation results are output. In this case, data will be saved or output every 1000 simulation steps.
As results, it outputs physical properties such as step, temperature, potential energy and pressure after each 1000 steps.

The figure below illustrates the time evolution of our MD simulation involving 1000 helium atoms in a periodic box at room temperature:

Performance
As can be seen in the below graph, our JAX kernel efficiently harnesses nearly the full capacity of the GPU (Device 1) to perform the simulation. This high level of resource utilization ensures that the computational power of the GPU is maximized, leading to significant improvements in the speed and performance of the simulation.

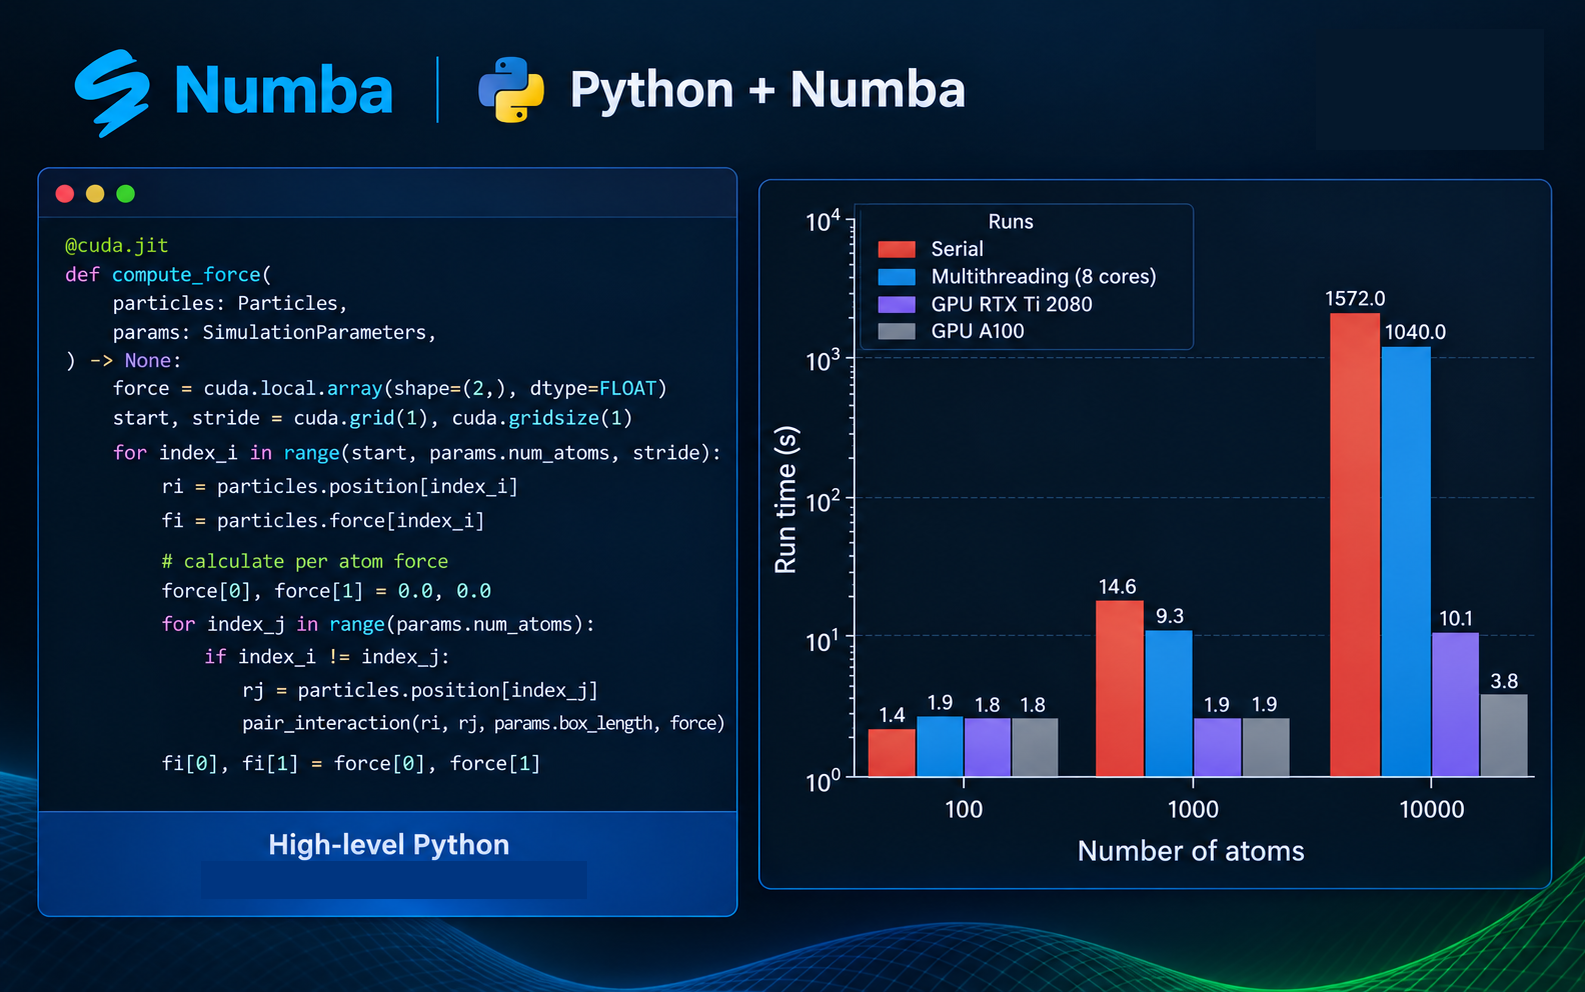
I also conducted the same MD simulation on my laptop CPU and a more powerful GPU, the A100. The results demonstrate a significant speedup with GPU calculations. To highlight the importance of using GPU hardware, I simulated a system with 2000 atoms as well. One of the great features of JAX is that you can seamlessly transfer your code execution from CPU to GPU without modifying the original code, saving considerable time and effort.

The Nanosecond per day is a common measure of the performance and efficiency of MD simulations, indicating how fast the simulation progresses. As demonstrated in the figure, GPU-accelerated computing can enhance the code’s performance by two orders of magnitude. For large-scale simulations, the optimal approach would be to parallelize the system using domain decomposition. In this method, each domain, with its limited GPU memory requirements, can be used to calculate forces and update atom states. Wrapping up
I hope this post has inspired you to explore and learn JAX, and to consider applying it to your own projects.
You can learn more about my Pantea project with JAX through the repository linked below.
Thank you for reading, and I encourage you to dive deeper into JAX to unlock its full potential for your work!